DJI Osmo Mobile 6 Smartphone User Manual
Before Use
Read the following documents before using DJITM OSMOTM Mobile 6:
- Safety Guidelines
- Quick Start Guide
- User Manual
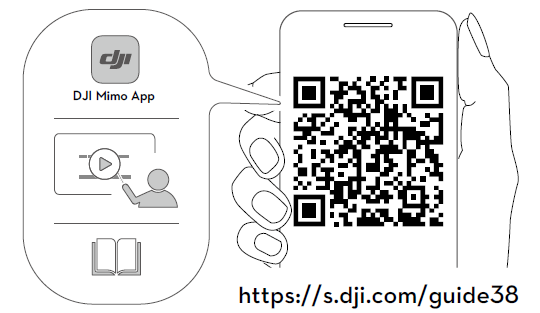
It is recommend to watch all tutorial videos on the official DJI website (www.dji.com/ osmo-mobile-6/video) or in the DJI Mimo app. Read the safety guidelines and quick start guide before using for the first time. Refer to this user manual for more information.
Introduction
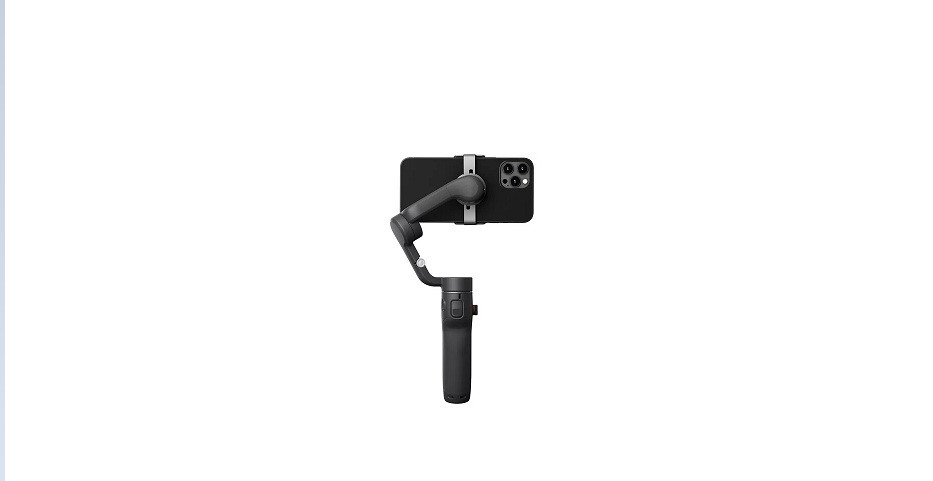
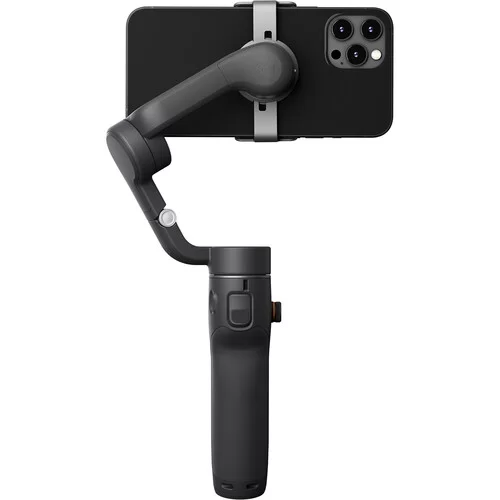
Boasting 3-axis stabilization and a built-in extension rod, the lightweight Osmo Mobile 6 unlocks the full potential of your mobile phone. The foldable magnetic design makes setup easier than ever, transportation and storage more convenient, and it can power on automatically once unfolded. Osmo Mobile 6 can be operated in both portrait and landscape, while the upright, underslung, side grip, and low position modes help capture the perfect shot. Take content to the next level through DJI Mimo with Active TrackTM 5.0, Dynamic Zoom, and Pano. The Story mode, Time-lapse, and Shot Guides provide step-by-step tutorials according to the scenario and help generate a video that can be shared on social media.
Overview
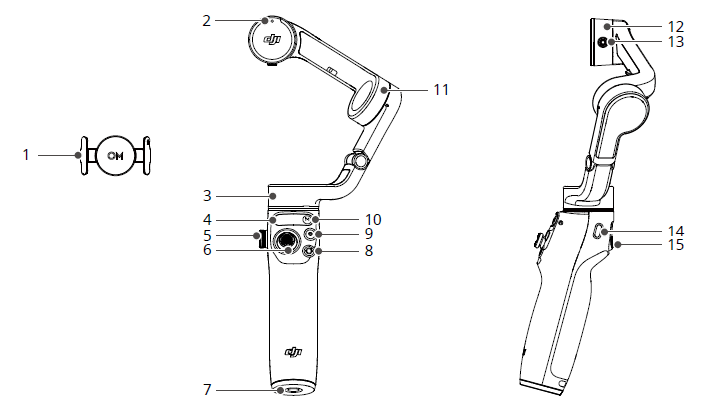
- Magnetic Phone Clamp 3
- Magnetic Alignment
- Pan Motor
- Status Panel
- Side Wheel
- Joystick
- 1/4″-20UNC Port
- Switch Button
- Shutter/Record Button
- Power/M Button
- Tilt Motor
- Roll Motor
- M3×0.5Screw Hole
- Charging Port (USB-C)
- Trigger
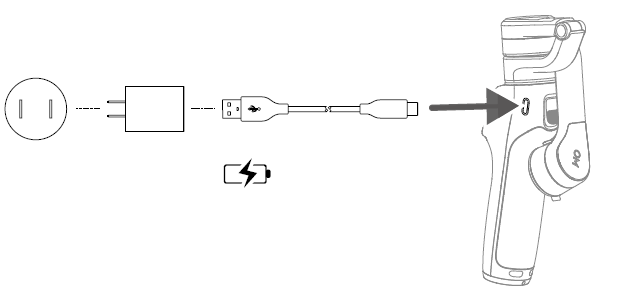
Charging
To charge Osmo Mobile 6, connect a USB adapter (not included) to the charging port using the power cable. The battery is fully charged when the battery level indicator turns off on the status panel.
Charging time: approx. 1 hour 24 minutes (tested in the environment temperature of 25° C when using a 10 W charger)
Max runtime: approx. 6 hours and 24 minutes (tested with the gimbal balanced and held steadily. This value should be taken as a reference only)
Attaching the Phone
- Unfold the gimbal as Osmo Mobile 6 will power on automatically once unfolded.
- Attach the magnetic phone clamp in the center of the phone. The magnetic phoneclamp can be stretched to adapt to the mobile phone width. The camera mark should point towards the camera of the
- Align the marks on the phone clamp and the phone clamp mounting plate. Attach the mobile phone to Osmo Mobile 6. Osmo Mobile 6 will stabilize once the gimbal mode indicator lights up on the status panel.
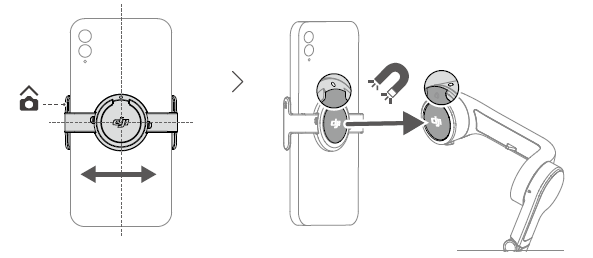
Magnetic Phone Clamp Tips
Make sure the direction of the magnet phone clamp is the same as shown in the figure above. For optimal performance, make sure the magnetic phone clamp is in the middle of the mobile phone, and the distance between the clamp arms is the same.
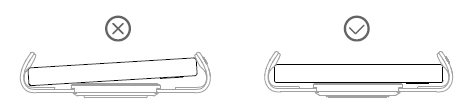
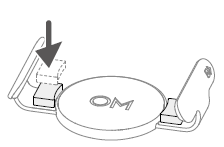
The anti-slip pads help to secure the mobile phone and the magnetic phone clamp. Attach the anti-slip pad to the magnetic phone clamp as shown in the figure below and press down firmly.
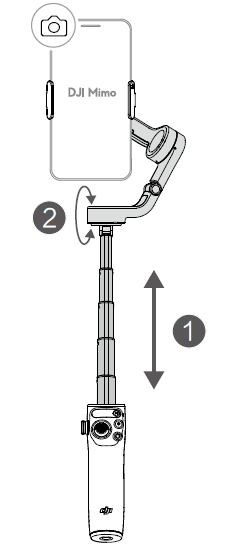
The built-IN extension rod can be extended to up to 215 mm and the angle can be adjusted from 0 to 90°.
Connecting to the DJI Mimo App
- Poweron Osmo Mobile
- Enable Bluetooth on the mobile phone and connect to the device with an OM6 prefix name in DJI
- Users are required to allow access to certain information when using DJI Mimo for the first time. The exact information will be listed in the prompt. An internet connections Osmo Mobile 6 will be activated after authorization and the app will enter the camera view.
When connected via Bluetooth, Osmo Mobile 6 is able to control the mobile phone camera without DJI Mimo. Refer to the Mobile Phone Compatibility List for details www.dji.com/osmo-mobile-6.
Firmware Update
Use DJI Mimo to update the Osmo Mobile 6 firmware. It takes approximately three minutes to complete an update.
How to Update
Before starting an update, make sure that the battery level indicator shows green or yellow. Connect Osmo Mobile 6 to your mobile device and launch DJI Mimo. You will be prompted if a new firmware update is available. To start updating, connect the mobile device to the internet and follow the on-screen instructions.
Do not exit DJI Mimo while updating the firmware. Pay attention to on-screen prompts. The system status indicator will blink green and red alternatively and become solid green once the firmware update has completed successfully.
If an update is unsuccessful, restart DJI Mimo, reconnect the Bluetooth, and retry.
Storage
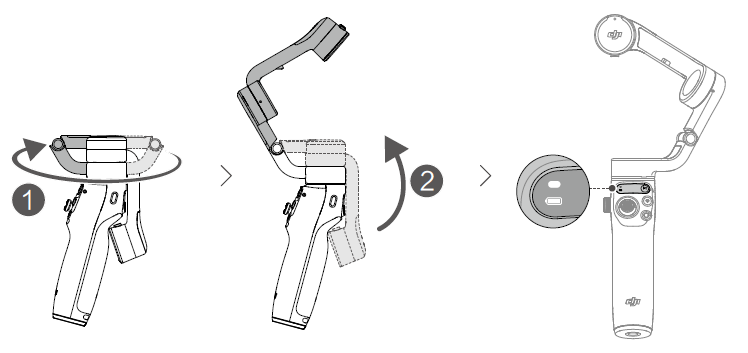
Osmo Mobile 6 is designed to be folded for easier storage and transportation. Make sure to fully retract the built-in extension rod and fold the Osmo Mobile 6 after powering off. Rotate the pan and tilt axis as shown and fold the gimbal. The mark on the axis arm should slot into the hole on the handle. Rotate the pan axis as shown to lock in place.
Specifications
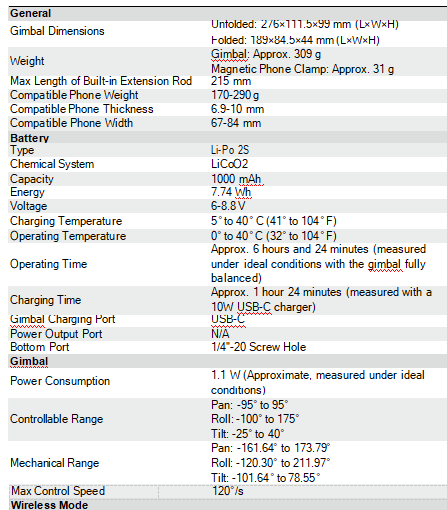
| Max Control Speed | 120°/s |
| Wireless Mode | |
| Model | Bluetooth 5.1 |
| Other | |
| App | DJI Mimo |
| Grip Tripod | |
| Dimensions | Length: 138 mm
Diameter: 32 mm |
Weight Approx. 72 g
ABOUT
Some of the features you might find in the DJI Osmo Mobile series, including potential features in the Osmo Mobile 6 if it exists, could include:
- Stabilization: The primary function of the Osmo Mobile is to stabilize your smartphone’s camera, providing smooth and steady video recordings.
- Smartphone Compatibility: DJI designs its gimbals to be compatible with a wide range of smartphones, including both Android and iOS devices.
- Multiple Modes: Osmo Mobile gimbals often come with various modes such as Pan Follow, Lock Mode, and FPV Mode, which allow for creative and dynamic shooting options.
- Active Track: This feature enables the gimbal to automatically track and follow a subject, keeping it centered in the frame while you move around.
- Time lapse and Motion Time lapse: Create captivating time lapse videos and add motion to your time lapses for more dynamic results.
- Gesture Control: Some models might support gesture control, allowing you to start or stop recording by making specific hand gestures.
- Battery Life: Battery life can vary between models, but DJI generally aims to provide long-lasting performance.