
BOSE ProFlight Series 2 aviation headset User Manual
BOSE CONNECT APP
Enhance your headset experience with the Bose Connect app.
FEATURES
Easily connect to and switch between multiple mobile devices with a single swipe.
Customize your headset experience:
- Name your headset.
- Share audio and music.
- Adjust Bluetooth volume.
NOTE: Applies to Bluetooth headsets only. - Find answers to frequently asked questions.

WHAT’S IN THE BOX
CONTENTS
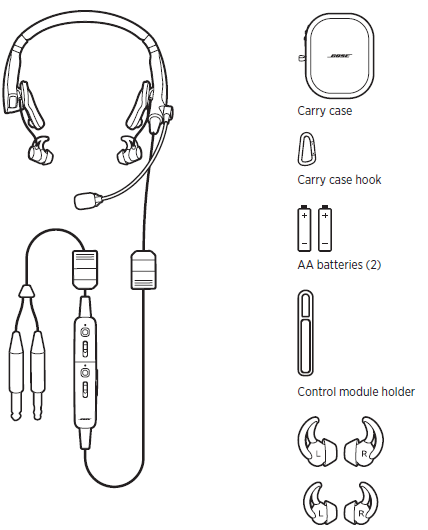
NOTE: Medium (gray) tips are attached to the earbuds.
NOTES:
- For control module options.
- For aircraft connector types.
- If any part of the product is damaged, don’t use it. Contact your authorized Bose dealer or Bose customer service.
Visit: worldwide.Bose.com/Support/ProFlight2
What ’s in the Box
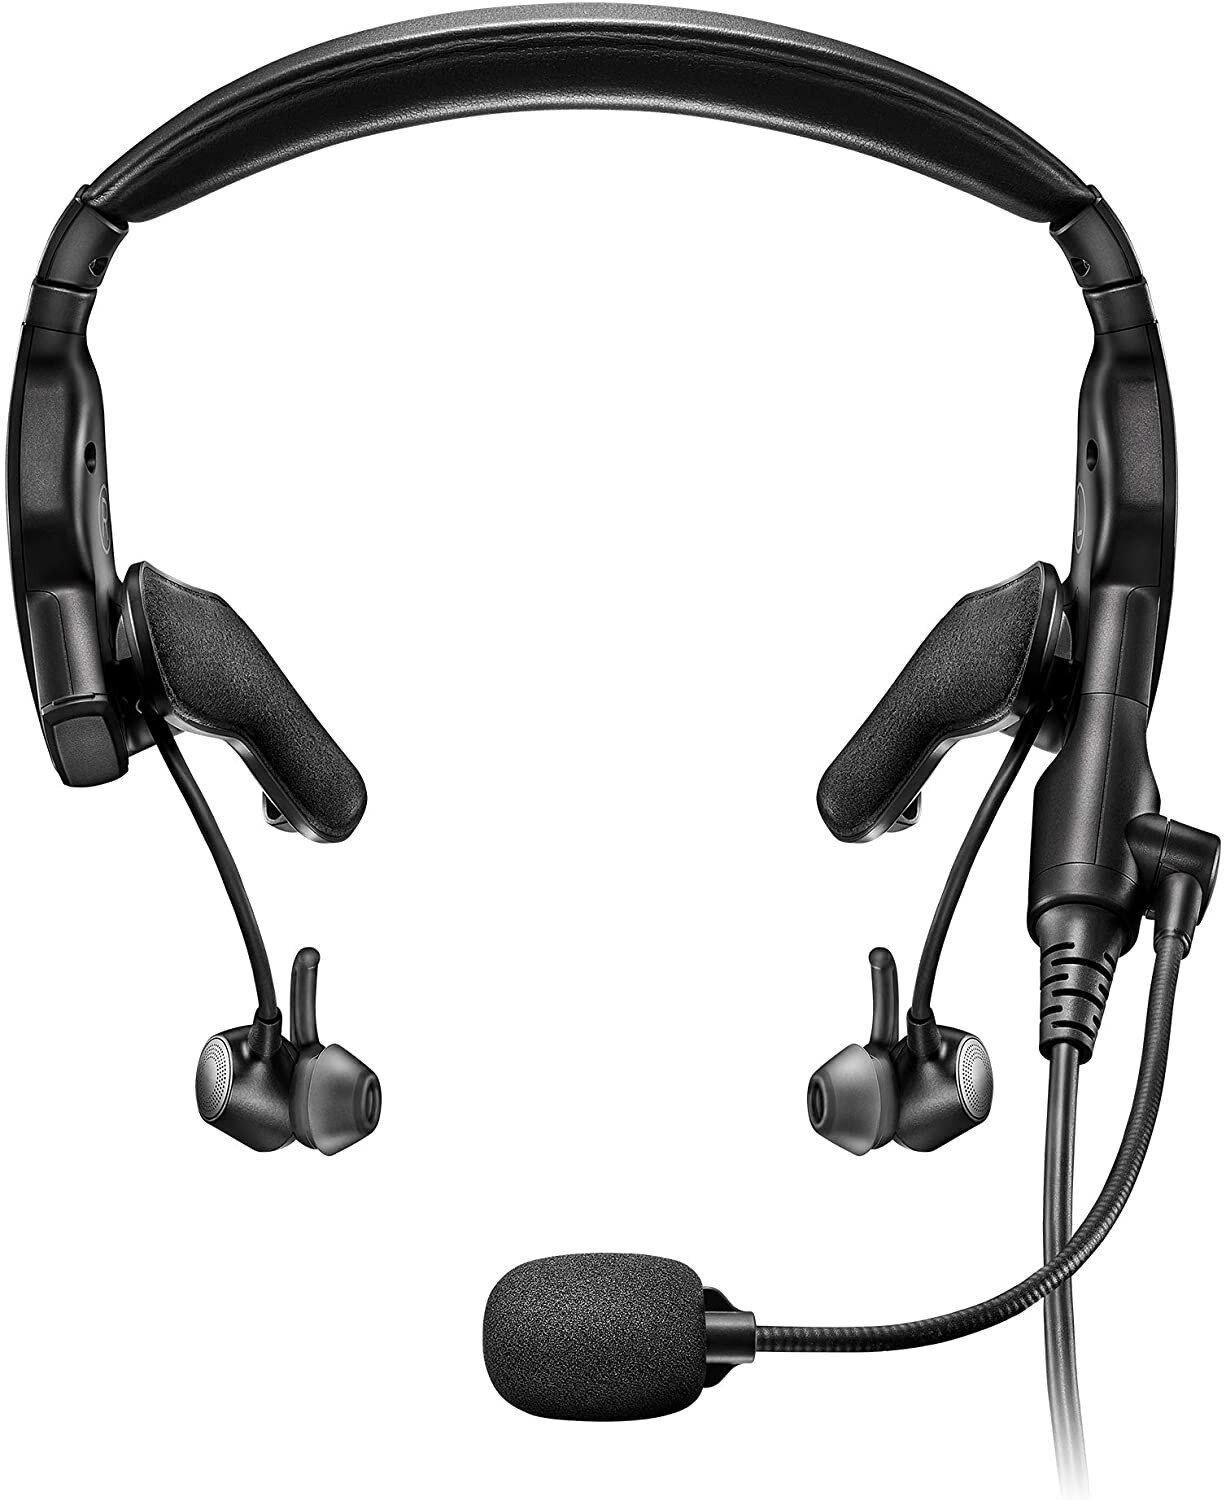
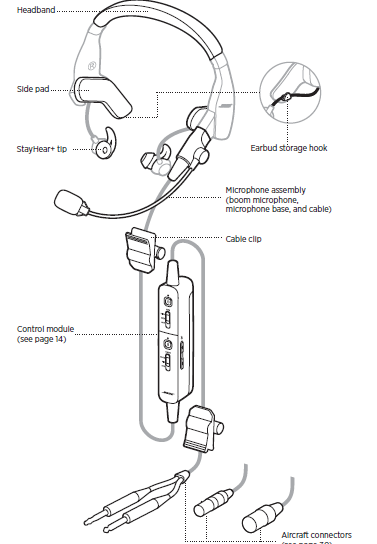
HEADSET COMPONENT
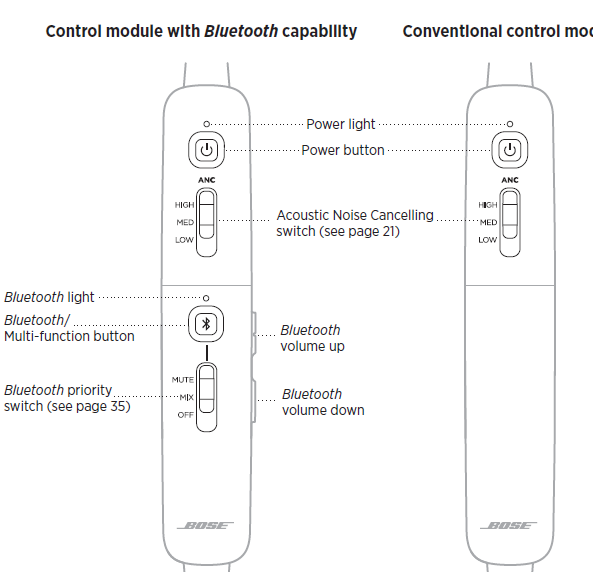
CONTROL MODULE OPTIONS
There are two options for the control module:
- Control module with Bluetooth capability
- Conventional control module
IMPORTANCE OF PROPER FIT
FIT THE HEADBAND
Proper fit is important both for comfort and optimal noise cancellation performance.
- Using the left T and right U icons on the headband to orient the headset properly, rotate the side pads into position.
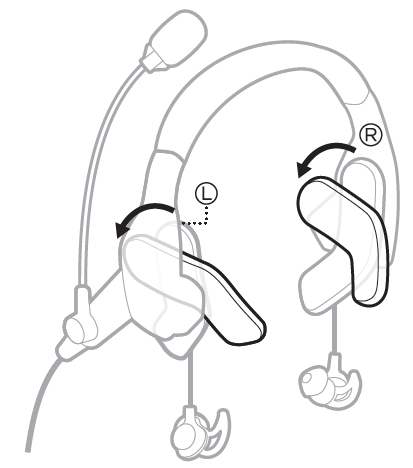
- Place the headset on your head.
- Adjust the headband so the side pads rest above your ears.
CHOOSE THE CORRECT STAYHEAR+ TIPS
For optimal audio performance, it is important to choose the correct size StayHear+ tip. Select the size that gives you the best comfort and fit in each ear.
To determine the best fit, you may need to try all three sizes. You may need a different size for each ear.
NOTE: Without a properly fitting tip, the noise reduction and audio performance of the headset will be degraded. To test the fit, try speaking aloud wearing the headset while it’s powered off. Make a low-pitched “eee” sound. Your voice should sound amplified and balanced in both ears, similar to when you plug your ears with your fingers. If not, try another tip size.
Each StayHear+ tip and earbud is marked with either an L or an R. Be sure to attach the left tip to the left earbud and the right tip to the right earbud.

FIT THE EARBUDS TO YOUR EAR
The StayHear+ tip allows the earbud to rest comfortably and securely in your ear.
The tip wing fits just under your ear ridge.
- Insert the earbud so the StayHear+ tip rests gently in the opening of the ear canal.
- Tilt the earbud back and tuck the tip wing under the ear ridge until it is secure.
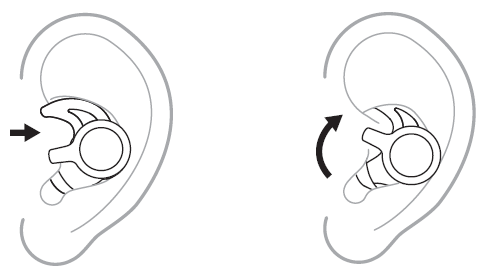
TIP: If the StayHear+ tips don’t fit securely, choose a different size.
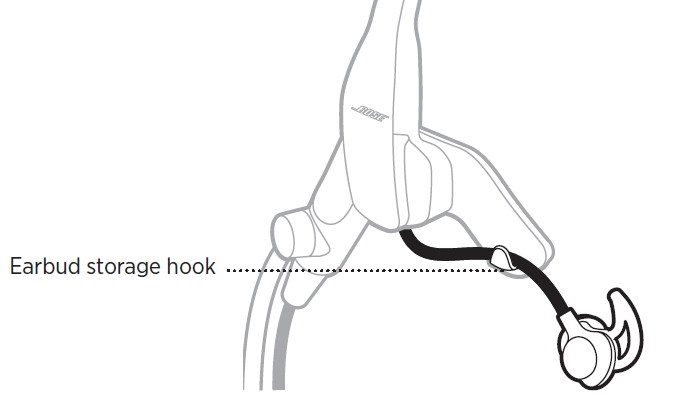
Single earbud use
When you want to use the headset with one earbud, you can stow the other earbud using the earbud storage hook on the back of the side pad.
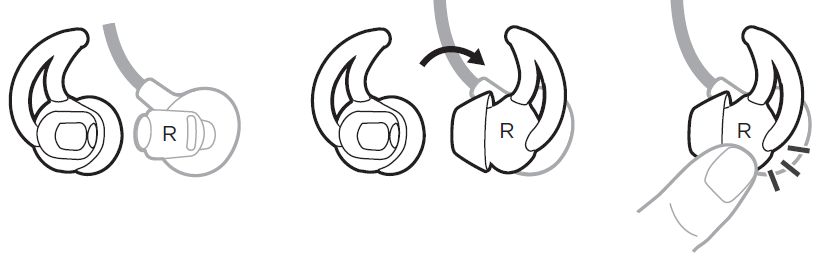
CHANGE THE STAYHEAR+ TIPS
- Holding the earbud, gently grasp the attached Stay Hear+ tip and peel it away from the earbud.
CAUTION: To prevent tearing, grasp the Stay Hear+ tip by its base. Do NOT pull on the tip wing.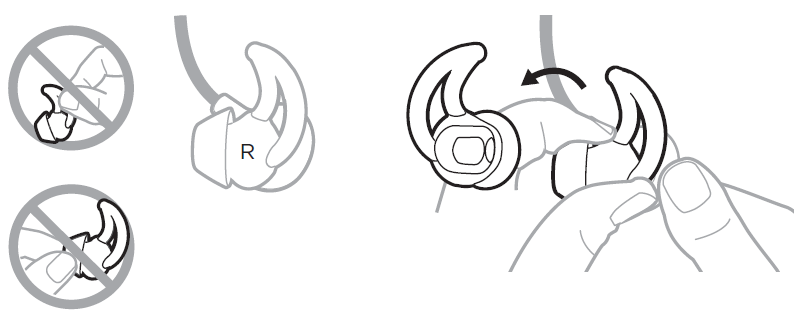
- Align the opening of the new StayHear+ tip with the earbud nozzle and rotate the tip onto the nozzle. Press the base of the tip until it clicks securely into place.
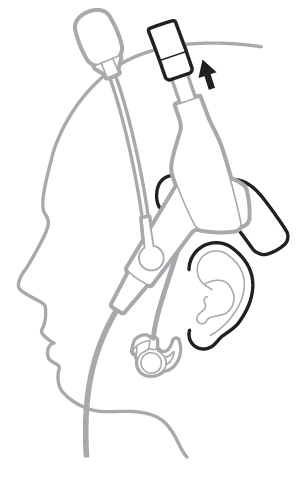
ADJUST THE MICROPHONE
NOTE: By default, the reversible microphone ships from the factory attached to the left side of the headset. If you want to move the microphone to the other side of the headset.
- Grasp the microphone base, and adjust the boom so the microphone is level with your mouth.
CAUTION: Microphone placement is important for clear communication.
It can rotate 300°. Do NOT force the microphone beyond the intended rotation or damage could occur.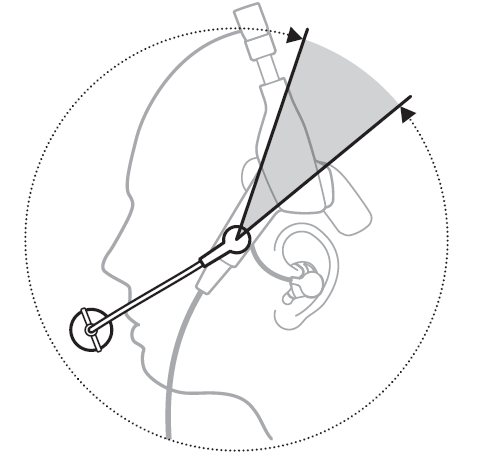
- Position the microphone so it is 0.5″ (12.7 mm) from your lips, and the white surface on the base is facing your mouth.NOTES:
- If necessary, twist the microphone base to rotate the microphone into position.
- The microphone should not be touching your lips.
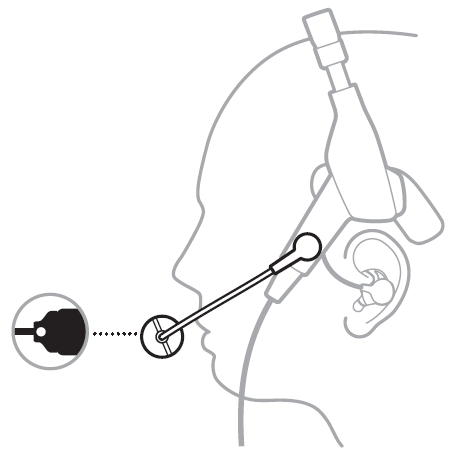
- Test the headset before flight.
CONDITIONS RELATED TO FIT
In very loud conditions, such as during takeoff, you may experience a brief reduction in noise cancellation as the headset compensates for a momentary pressure change.
If this continues when the sound level returns to normal, see “Acoustic Noise Cancellation” A low rumbling sound or frequent, brief losses of noise cancellation may indicate an improper fit or blocked earbud ports. See “Choose the correct Stay Hear+ tips” information on proper fit or “Clean the headset.
During a long flight, you may feel a slight pressure point, which can be relieved by adjusting the headband position.
SECURE CLOTHING CLIP AND CONTROL MODULE HOLDER
The cable clips and control module holder secure the cable and control module to your clothing, a safety harness, sun visor rail, or aircraft headset hook for quick and easy access.
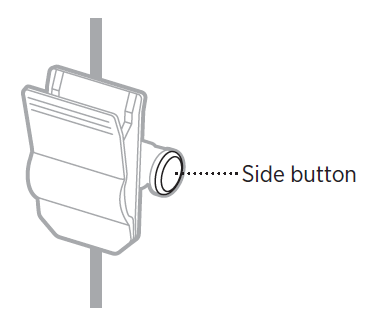
Clothing clip
Press the side button to release and reposition the clip along the cable.
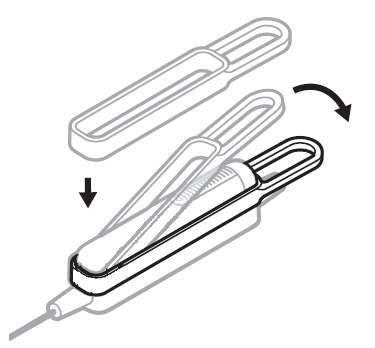
Control module holder
Pull the strap over the control module to secure it in place.
HEADSET CONTROLS
POWER ON
Press the Power button.
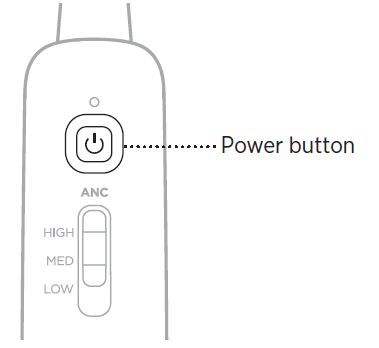
The Power light glows amber then blinks according to the power level.
NOTE: The first time you power on your headset, noise cancellation is fully enabled.
POWER OFF
Press and hold I for three seconds, then release.
When powered off, the headset provides passive audio communications.
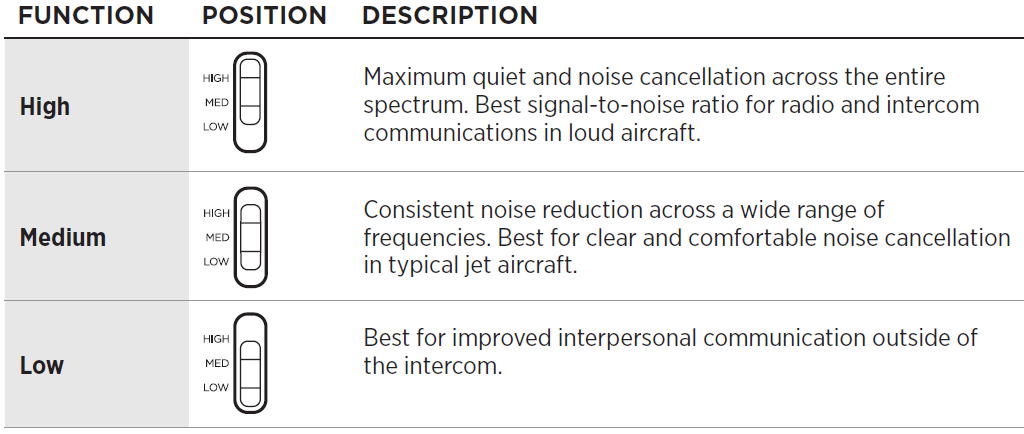
ACOUSTIC NOISE CANCELLATION
Acoustic Noise Cancellation reduces unwanted noise providing a clearer, more lifelike audio performance.
You can choose your noise cancellation based on your listening preferences and environment.
NOTE: When you receive a call, the headset remains at the current noise cancellation level.
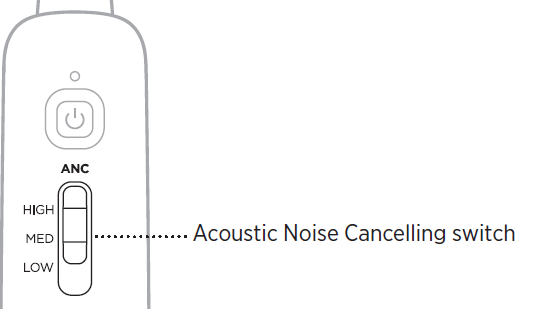
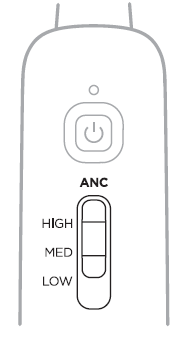
ACOUSTIC NOISE CANCELLING FUNCTIONS
The Acoustic Noise Cancelling switch is located on the front of the control module.
TAP CONTROL FOR TALK-THROUGH COMMUNICATION
When you need to focus on interpersonal communication coming from a specific direction, you can automatically set noise cancelling to Low on a single earbud by firmly double-tapping the earbud.
NOTES:
- By default, Tap Control is set to Off.
- Tap Control is available only when the Acoustic Noise Cancelling switch is in the High or Medium position.
- Make sure the Acoustic Noise Cancelling switch is in the High or Medium position.
- Set the Tap Control switch to On.
- Firmly double-tap the earbud.
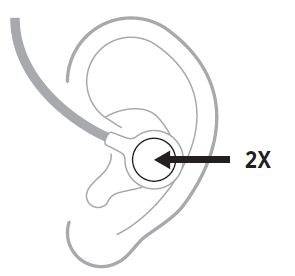
NOTE: Tap Control is not a touch control feature. You must firmly double-tap the earbud in order to activate the feature.
Reset Tap Control
To reset Tap Control and set noise cancelling in both earbuds to the Acoustic Noise Cancelling switch level, double-tap the earbud with Tap Control active or move the switch to another position.
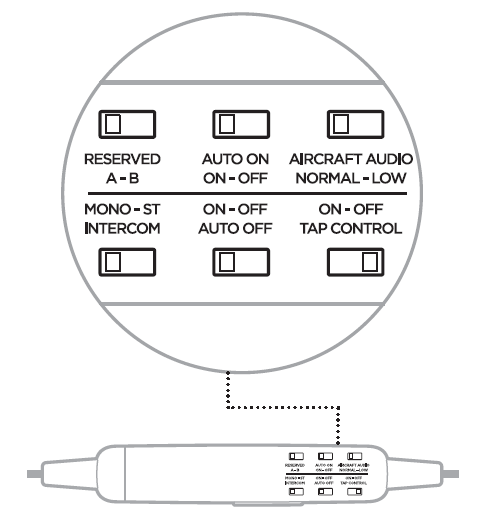
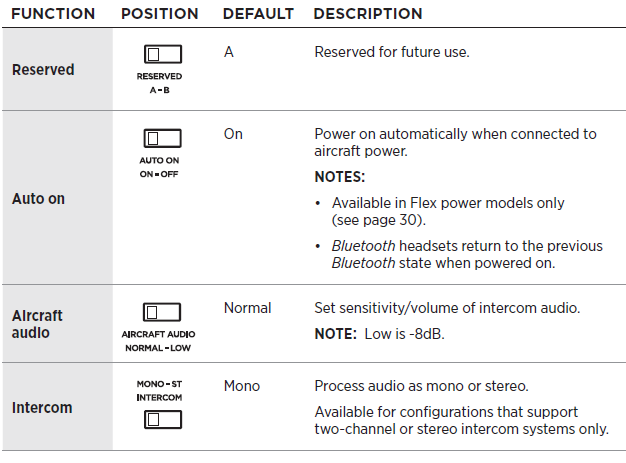
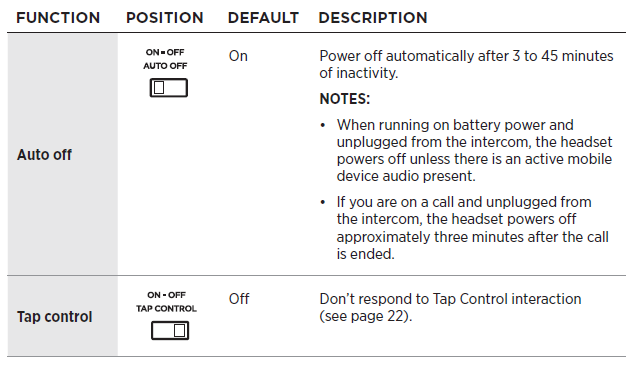
OPERATION SWITCHES
OPERATION SWITCH FUNCTIONS
The operation switches are located in the control module battery compartment.
NOTE: Some operation switches are not available on all models.
CHANGE THE OPERATION SWITCHES
- Power off the headset.
- On the back of the control module, press down firmly on the finger indent and slide the cover down.
CAUTION: The battery cover is tethered to the control module. Do NOT attempt to detach it.
- Remove the batteries.
- Using a pen or a small, flat-tipped screwdriver, gently move the switch.
- Insert two alkaline AA batteries, observing proper polarity.
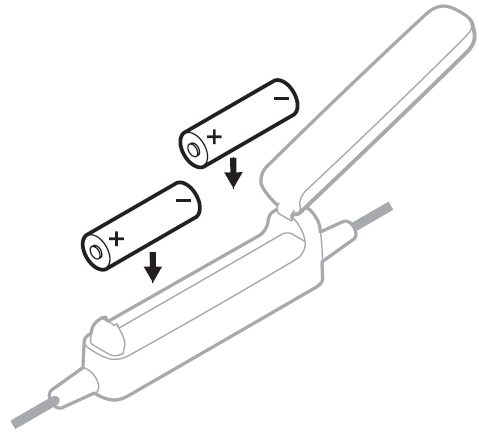 CAUTION: If the batteries don’t fit correctly, do NOT force them in. Forcing an improper connection will cause permanent damage to the control module.
 - Close the battery cover, press firmly down on the finger indent, and slide the cover into place.
