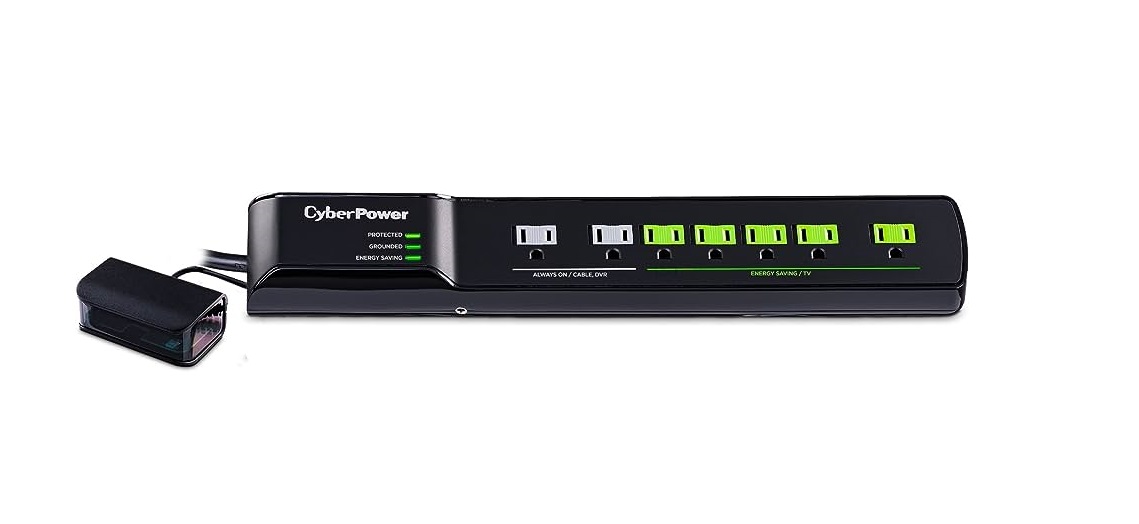
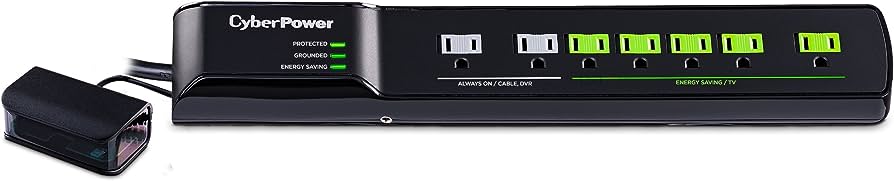
Cyber Power HT705GR Tier 2 Advanced Power Strip User Manual
FEATURES
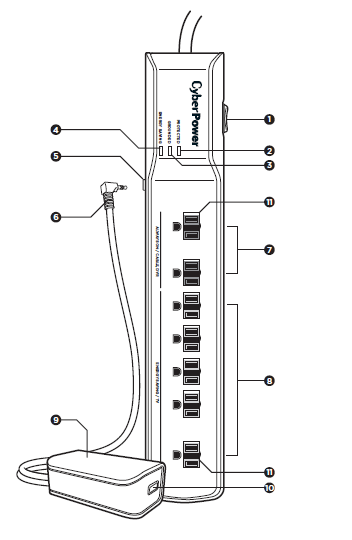
- Green Rocker Power Switch
- Surge-Protected Indicator LED
Illuminated when the surge-protection feature is workingproperly - Ground Indicator LED
Illuminated when the grounded feature is working properly - Energy-Saving Indicator LED
Illuminated only during the Power-Saving Measurement Initialization - Small-Input Jack
- Sensor Plug
- Always-On Outlets
These outlets receive continuous power - Energy-Saving Outlets
See operation section above - IR Sensor
Detects IR signals from your remote - IR Sensor Button
Sets the energy saving timer - 2 Wide-Spaced Outlets
SPECIFICATIONS
- Model Number: HT705GR
- Outlets: HT705GR2 Always-On Outlets 5 Energy-Saving Outlets (5 Standard Outlets and 2 Transformer spaced outlets )
- Surge Protection: 1,500 Joules
- Electrical Rating: 125 V / 15 A / 1875 W
- UL Clamping Voltage: UL 1449 4th 500 V (H-N, H-G, N-G)
- Maximum Peak Current: 60,000 A
- 3 AC Lines Protected: H-N: 30,000 A,H-G: 15,000 A,N-G: 15,000 A(The maximum surge possible on household wiring is 6,000 volts)
- Response Time: Less than 1 nanosecond
- Attenuation: Up to 43 dB
- EMI/RFI Filtration:150 kHz to 100 MHz
- IR Detection Range/Degree: 16.4 ft./60
WARNING: This product can expose you to chemicals including bisphenol A (BPA) and styrene (ABS), which is known to the State of California to cause reproductive harm and cancer. For more information, go to www.P65Warnings.ca.gov.
TROUBLESHOOTING
| PROBLEM | TO CHECK |
| The Always-On outlets are not receiving the power | • Ensure the plug connections are secure and the power switch is set to the on/reset position. |
| The HT705GR does not power off the connected equipment in standby mode. | • Ensure the equipment is plugged into the Energy-Saving outlets, not into the Always On outlets.
• The HT705GR has not detected the connected equipment in standby. Please press the IR sensor button for more than 10 seconds and release to enter into the setting mode. When switching surge off/on again assure all connected equipment are placed in power-off or standby mode. |
| The IR Sensor is not operating. | • Turn off the HT705GR power, re-plug the IR Sensor cable, then turn on the HT705GR |
| The IR Sensor flashes frequently during normal operation. | • It may be radio frequency interfer- ence. Check for other devices that may be causing interference in the area.
• Move the IR Sensor to another loca- tion that is within line of sight and normal operation range of connected equipment remote controls. |
| The surge protected LED of the HT705GR is on, but my IR Sensor LED does not work (when the IR Sensor is plugged in and powered on). | • Ensure the IR Sensor cable is safely and securely connected to the HT705GR, and;
• Press the IR Sensor button, the Energy-Saving outlet will turn on. |
| The HT705GR is not working / the protected LED is not illuminated. | • Remove all the connected equipment and power cord from the wall outlet. Reset surge protector by pressing and hold the IR Sensor button for more than 10 seconds, then release.
• If the grounded indicator does not light when you plug in the surge pro- tector, move the surge protector to a different grounded three-prong AC outlet. If the surge protector proves to be working properly, your outlets may not be properly grounded and need to be repaired by a professional electrician. |
| The connected equipment turned off after 1 hour. | • The default setting for the energy saving time is 1 hour.
• If you want to change the energy saving time, please check the quick start guide section to change default energy saving time from 1 or 2 hours. |
QUICK START GUIDE
- Connections:
Turn power switch to OFF. Plug surge protector into wall. Plug powered-down electronic devices in to appropriate outlets. Connect infrared (IR) sensor to surge protector into small input jack. Place glossy side of IR sensor in sightline of remotes. Turn power switch to ON using green rocker switch. LED indicators (Protected & Grounded) should illuminate. - Power-Saving Measurement Initialization:
The HT705GR performs a power-saving detection measurement after the green rocker switch is turned ON. The Energy-Saving outlets will be turned on for 10 seconds, and the energy-saving LED indicator will illuminate at the same time. After initialization is complete, the Energy-Saving outlets and energy-saving LED indicator will turn OFF, and the unit is available for use. To reset the measurement of your power consumption, press and hold the IR sensor button for more than 10 seconds, release, and this will trigger a nonenergy-saving measurement of the connected equipment. - The Energy-Saving Timer:
The energy-saving timer monitors the time period of power delivery to the Energy-Saving outlets. The timer has a default setting of 1 hour. If the timer does not receive any IR signal during this window, it will turn off Energy-Saving outlets. - Operation:
Turn TV ON. Power ON all connected equipment. When the IR sensor receives IR signals, the Energy-Saving outlets will power on. The IR sensor’s blue LED light will blink for 4.5 minutes after 1 hour after last click of remote to give usera notice of shutdown. Click any button on a TV remote or the volume button on a cable provider’s remote to restart energy-saving timer at zero. Blue LED light will stop blinking. - Setting the Energy-Saving Timer:
If you want to change the energy-saving time window, hold the IR sensor button down for 7 seconds; LED light will flash 3 times, release. Press IR sensor 1 time. LED light will flash 1 time, and timer will be 1 hour. Hold the IR sensor button down for 7 seconds. LED light will flash 3 times, release. Press IR sensor 2 times, pausing in between. LED light will flash 2 times, and timer will be 2 hours. - Timer Shut-Down:
When the timer expires, the IR sensor will continue toflash for 4.5 minutes, then the Energy-Saving outlets will power off.
CAUTION
TO REDUCE THE RISK OF ELECTRIC SHOCK: Use only in dry locations and only indoors.
- DO NOT plug into another relocatable power tap.
- DO NOT “daisy chain” surge protectors.
- DO NOT use with any aquarium equipment.
- DO NOT use if properly grounded outlets are not available.
- DO NOT install this device if there is less than 10 meters (30 feet) of wire between the electrical outlet and electrical service panel.
- DO NOT use for medical or life support equipment. This device features an internal protection that will disconnect the surge protective component at the end of its useful life, but it will maintain unprotected power to the load.
FOR MORE INFORMATION
Visit CyberPowerSystems.com for more information regarding:
- Product information and certifications
- Product warranty
- Connected equipment guarantee
TECHNICAL SUPPORT
- Visit: CyberPowerSystems.com/support
- Toll-Free: 1-877-297-6937
- © 2022 Cyber Power Systems (USA), Inc. All rights reserved.
- All other trademarks are the property of their respective owners.
FCC
CONFORMANCE APPROVALS
This device complies with Part 15 of the FCC Rules.
Operation is subject to the following two conditions: (1) this device may not cause harmful interference, and (2) this device must accept any interference received, including interference that may cause undesired operation.
This equipment has been tested and found to comply with the limits for a Class B digital device, pursuant to Part 15 of the FCC Rules. These limits are designed to provide reasonable protection against harmful interference in a residential installation. This equipment generates, uses, and can radiate radio frequency energy and, if not installed and used in accordance with the instructions, may cause harmful interference to radio communications.
However, there is no guarantee that interference will not occur in a particular installation. If this equipment does cause harmful interference to radio or television reception, which can be determined by turning the equipment off and on, the user is encouraged to try to correct the interference by one or more of the following measures:
- Reorient or relocate the receiving antenna.
- Increase the separation between the equipment and receiver.
- Connect the equipment into an outlet on a circuit different from that to which the receiver is connected.
- Consult the dealer or an experienced radio/TV technician for help.
WARNING: Changes or modifications not expressly approved by the party responsible for compliance could void the user’s authority to operate the equipment.